[Android] JetPack Navigation으로 Bottom Navigation 설정하기
안드로이드를 공부하면서 간단한 화면 전환은 intent로 구현했었다.
하지만 레이아웃이 복잡해질수록 코드가 길어지며 가독성이 떨어지는 문제점을 확인할 수 있었다.
이 경우를 해결하기 위해 JetPack Navigation이 등장하였다.
네비게이션을 사용하면 한 눈에 볼 수 있는 화면들과, 프래그먼트의 이동을 더욱 쉽게 구현할 수 있는 장점이 있다.
Navigation 설정하기
//네비게이션
def nav_version = '2.4.1'
implementation "androidx.navigation:navigation-fragment-ktx:$nav_version"
implementation "androidx.navigation:navigation-ui-ktx:$nav_version"
build.gradle 파일에 필요한 라이브러리를 추가해준다.
이 부분은 안드로이드 개발 공식 사이트에 제공되어 있다.
또한 plugins에 다음을 추가해주고,
// 네비게이션
id 'androidx.navigation.safeargs.kotlin'
dependencies에 마지막으로 다음 코드를 추가해주고 sync now를 눌러주면 셋팅은 끝이난다.
def nav_version = "2.4.1"
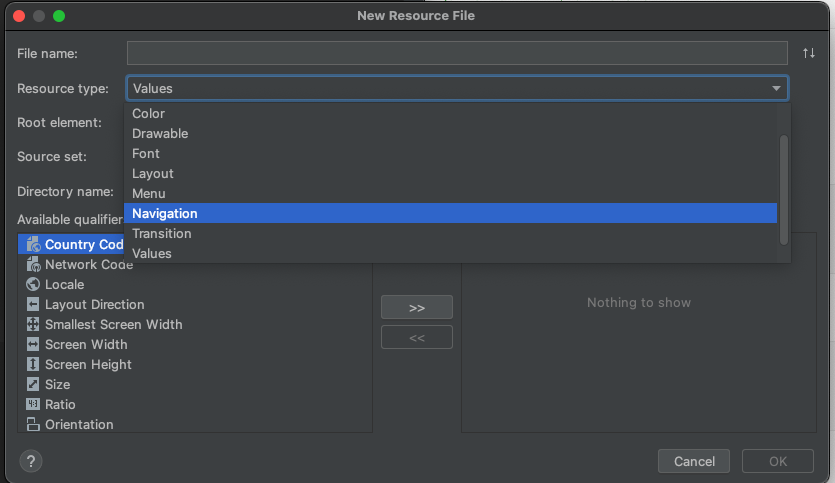
classpath("androidx.navigation:navigation-safe-args-gradle-plugin:$nav_version")그 다음 res -> android resource file -> type 에서 다음과 같이 navigation을 선택하고 생성하면
res -> navigation 폴더 안에 navigation graph가 생성된다.
다음 그래프 파일에 접속하여 다음 그림의 버튼을 누르면 구현되어있는 프래그먼트와 액티비티 파일들을 볼 수 있다.
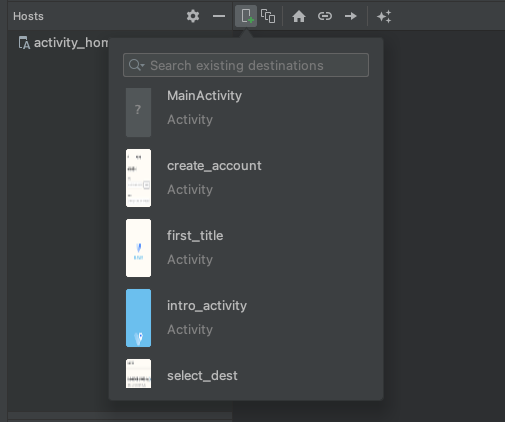
이렇게 activity파일들과 fragment파일들을 확인할 수 있다.
하지만 위의 그림과 같이 mainActivity파일은 ? 로 되어있고 인식을 하지 못하고 있다.
tools:context=".HomeActivity"이렇게 각각의 파일위에 클래스와 연결, 인식할 수 있는 클래스 파일의 위치를 연결해주어야한다.
이렇게 각각의 클래스 파일에 연결을 해주었으면 바텀네비게이션을 만들어보자.
전 게시물과 같이 액티비티를 하나 구성하여 바텀네비게이션 뷰를 작성해보자.
<com.google.android.material.bottomnavigation.BottomNavigationView
    android:id="@+id/my_bottom_nav"
    android:layout_width="match_parent"
    android:layout_height="wrap_content"
    android:background="@drawable/bottom_nav_background"
    app:menu="@menu/bottom_nav_menu"
    app:labelVisibilityMode="labeled"
    app:layout_constraintLeft_toLeftOf="parent"
    app:layout_constraintBottom_toBottomOf="parent"
    app:layout_constraintRight_toRightOf="parent"
    />
액티비티.xml 파일에 적어주었으면 menu에 바텀네비게이션의 아이템 구성요소를 추가해주자
<menu xmlns:android="http://schemas.android.com/apk/res/android">
    <item
        android:id="@+id/homeFragment"
        android:title="홈"
        android:icon="@drawable/bottom_nav_home_selector"
        />
    <item
        android:id="@+id/searchFragment"
        android:title="검색"
        android:icon="@drawable/search_logo"
        />
    <item
        android:id="@+id/diaryFragment"
        android:title="다이어리"
        android:icon="@drawable/diary_logo"
        />
    <item
        android:id="@+id/myInfoFragment"
        android:title="내프로필"
        android:icon="@drawable/my_info_logo"
        />
</menu>
이 때 주의해야할 점이 있다!!
꼭 nav_graph 파일에 있는 id와 여기 있는 아이템의 id이름이 꼭 같아야한다!
아니면 nav_graph와 바텀네비게이션이 연결이 되지 않는다.
<navigation xmlns:android="http://schemas.android.com/apk/res/android"
    xmlns:app="http://schemas.android.com/apk/res-auto"
    xmlns:tools="http://schemas.android.com/tools"
    android:id="@+id/nav_graph"
    app:startDestination="@id/homeFragment">

    <fragment
        android:id="@+id/homeFragment"
        android:name="com.cookandroid.teamproject1.HomeFragment"
        android:label="fragment_home"
        tools:layout="@layout/fragment_home" />
    <fragment
        android:id="@+id/searchFragment"
        android:name="com.cookandroid.teamproject1.SearchFragment"
        android:label="fragment_search"
        tools:layout="@layout/fragment_search" />
    <fragment
        android:id="@+id/diaryFragment"
        android:name="com.cookandroid.teamproject1.DiaryFragment"
        android:label="fragment_diary"
        tools:layout="@layout/fragment_diary" />
    <fragment
        android:id="@+id/myInfoFragment"
        android:name="com.cookandroid.teamproject1.MyInfoFragment"
        android:label="fragment_my_info"
        tools:layout="@layout/fragment_my_info" />
</navigation>
이렇게 navigation에 있는 파일들의 프래그먼트들의 id와 바텀네비게이션에 있는 아이템들의 id가 같아야지 연결이 가능하다.
그리고 위의 코드를 보면 startDestination이라고 되어있는데, 이는 액티비티가 실행될 때 첫 프래그먼트의 시작을 정의하는 코드이다.
이제 액티비티 파일에가서 다음의 코드를 작성하기만 하면 끝이다!
//네비게이션들을 담는 호스트
val navHostFragment = supportFragmentManager.findFragmentById(R.id.my_nav_host) as NavHostFragment

//네비게이션 컨트롤러
val navController = navHostFragment.navController

//바텀 네비게이션 뷰와 네비게이션을 묶어준다.
NavigationUI.setupWithNavController(mbinding.myBottomNav, navController)
여기서 my_nav_host는 액티비티 파일안에서 프래그먼트들이 보여질 뷰의 id이다.
그것을 navHost에 담아 컨트롤러를 생성한 다음
바텀네비게이션과 묶어주면 성공!!!
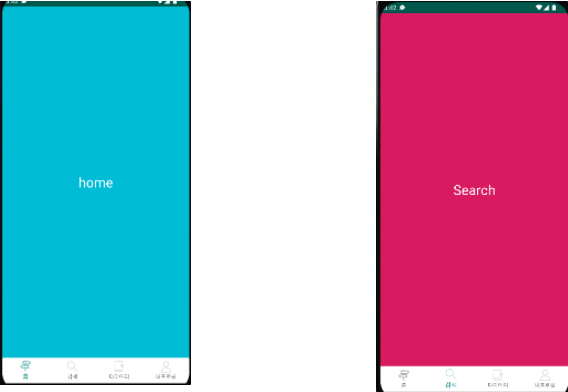
전 게시물과 비교하면 각각의 버튼마다 클릭리스터 이벤트를 부여해서 코드를 작성하는 것보다
이렇게 JetPack네비게이션을 사용하면 더욱 간결해진다!!